
Chocolate Peppermint Cookie Cups: A Festive and Delicious Holiday Treat
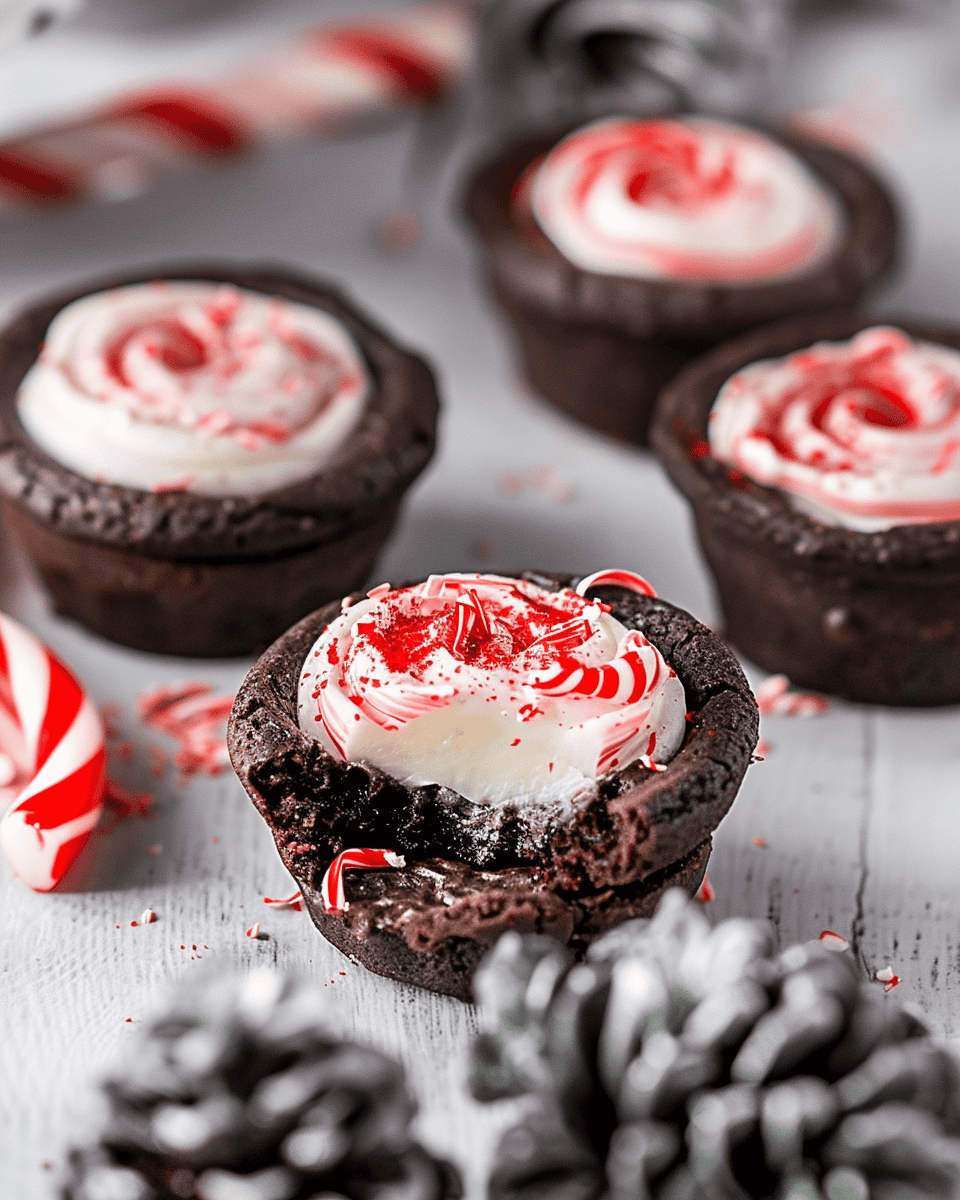
Get ready to impress your friends and family with these delightful Chocolate Peppermint Cookie Cups! With a rich chocolate cookie base and a creamy, peppermint-infused cheesecake filling, these treats are a perfect combination of flavors and textures. They’re not only delicious but also visually stunning, thanks to the vibrant red swirl of peppermint filling. Whether you’re hosting a holiday party or simply want to indulge in a festive treat, these cookie cups are sure to be a hit.
Ingredients
Chocolate Cookie Cups
- 2 cups all-purpose flour
- 1/4 cup Dutch-processed cocoa powder, sifted
- 1/4 cup black cocoa powder
- 1 tsp baking soda
- 1/2 tsp salt
- 1 cup unsalted butter, room temperature
- 1/2 cup granulated sugar
- 1 cup light brown sugar, packed
- 2 large eggs, room temperature
- 1 tsp vanilla extract
Peppermint Cheesecake Filling
- 1 cup heavy whipping cream, chilled
- 8 oz cream cheese, full fat
- 1/2 cup granulated sugar
- 1 tsp peppermint extract
- Red color gel
- Chopped candy canes (optional)
Directions
1. Preheat the Oven and Prepare the Pans
Preheat your oven to 350°F (175°C). Spray two regular-sized cupcake tins with cooking spray to ensure your cookie cups release easily.
2. Prepare the Chocolate Cookie Dough
In a medium bowl, whisk together the flour, Dutch-processed cocoa powder, black cocoa powder, baking soda, and salt. Set the dry ingredients aside.
In a large bowl, beat the butter and sugars on medium-high speed until the mixture is light and fluffy, which should take about 2-3 minutes. Reduce the speed and add the eggs, one at a time, followed by the vanilla extract. Continue beating until everything is well combined.
Gradually add the flour mixture to the wet ingredients, mixing until just combined. Be careful not to overmix, as this can make the cookie cups tough.
3. Shape and Bake the Cookie Cups
Using a large cookie scoop (about 3 tablespoons), scoop the dough into the prepared muffin tins. The dough will spread as it bakes, so make sure to leave space for the cups to form.
Bake the cookie cups for 10-13 minutes, or until they are mostly set but still soft in the middle.
Remove the tins from the oven and, while the cookie cups are still warm, use a small jar or container to press firmly down in the center of each cookie cup to create a well. This well will hold the peppermint cheesecake filling.
Allow the cookie cups to cool in the pans for 10 minutes. Then, gently twist each cup to loosen it from the pan, and transfer the cups to a wire rack to cool completely.
4. Prepare the Peppermint Cheesecake Filling
In a chilled bowl, whip the heavy cream until stiff peaks form. Using a cold whisk and bowl helps the cream whip more effectively.
In a separate bowl, beat the cream cheese, sugar, and peppermint extract until the mixture is smooth.
Gently fold the whipped cream into the cream cheese mixture until fully combined.
5. Pipe the Filling into the Cookie Cups
Using a small food-safe paintbrush, paint two stripes of red color gel on the inside of a piping bag fitted with a large round tip. This will create a beautiful red swirl when you pipe the filling.
Carefully fill the piping bag with the peppermint cheesecake filling. Pipe a swirl of the filling into the cooled cookie cups.
6. Chill and Serve
Refrigerate the filled cookie cups until the filling is set, which should take approximately 1-2 hours.
Before serving, sprinkle the tops of the cookie cups with chopped candy canes for a festive touch, if desired.
Serve the cookie cups chilled. These treats are best enjoyed within 2-3 days but can be frozen (without the chopped candy canes) for up to 4 weeks.
Serving Information
- Prep Time: 30 minutes
- Cooking Time: 13 minutes
- Total Time: 2 hours 43 minutes (including chilling time)
- Calories: 220 kcal per cup
- Servings: 24 cookie cups
Tips for Perfect Chocolate Peppermint Cookie Cups
- Use Room Temperature Ingredients: Ensure your butter, eggs, and cream cheese are at room temperature for easier mixing and a smoother texture.
- Chill the Whipping Cream: Whipping cream is best when it’s very cold, so keep it in the fridge until you’re ready to use it.
- Get Creative with Toppings: If candy canes aren’t your thing, you can top the cookie cups with chocolate shavings, crushed peppermint bark, or even a drizzle of melted chocolate.
Conclusion
These Chocolate Peppermint Cookie Cups are a delightful holiday treat that combines rich chocolate flavor with the refreshing taste of peppermint. They’re perfect for sharing, gifting, or simply enjoying with a warm cup of cocoa. Whether you’re making them for a festive gathering or just to spread some holiday cheer, these cookie cups are sure to be a favorite.
Print
Chocolate Peppermint Cookie Cups
- Total Time: 2 hours 43 minutes (including chilling time)
- Yield: 24 1x
Description
These Chocolate Peppermint Cookie Cups are the perfect festive dessert for the holiday season. The rich, chocolatey cookie cup pairs beautifully with the light and refreshing peppermint cheesecake filling, making each bite a delightful blend of flavors and textures. The red and white swirl of the filling adds a festive touch, and the sprinkle of chopped candy canes gives it an extra crunch.
Ingredients
Chocolate Cookie Cups
2 cups all-purpose flour
1/4 cup Dutch-processed cocoa powder, sifted
1/4 cup black cocoa powder
1 tsp baking soda
1/2 tsp salt
1 cup unsalted butter, room temperature
1/2 cup granulated sugar
1 cup light brown sugar, packed
2 large eggs, room temperature
1 tsp vanilla extract
Peppermint Cheesecake Filling
1 cup heavy whipping cream, chilled
8 oz cream cheese, full fat
1/2 cup granulated sugar
1 tsp peppermint extract
Red color gel
Chopped candy canes (optional)
Instructions
Chocolate Cookie Cups: Preheat your oven to 350°F (175°C). Spray two regular-sized cupcake tins with cooking spray.
In a medium bowl, whisk together the flour, Dutch-processed cocoa powder, black cocoa powder, baking soda, and salt. Set aside.
In a large bowl, beat the butter and sugars on medium-high speed until light and fluffy, approximately 2-3 minutes. Reduce the speed and add the eggs one at a time, followed by the vanilla extract. Beat until combined.
Gradually add the flour mixture to the wet ingredients, mixing until just combined.
Using a large cookie scoop (about 3 tablespoons), scoop the dough into the prepared muffin tins.
Bake for 10-13 minutes, or until the cookie cups are mostly set but still soft in the middle.
Remove the tins from the oven and immediately use a small jar or container to press firmly down in the center of each cookie cup to create a well.
Cool the cookie cups in the pans for 10 minutes. Loosen each cookie cup by gently twisting it in the pan. Cool for an additional 5 minutes, then remove from the pan and transfer to a wire rack to cool completely.
Peppermint Cheesecake Filling: Whip the heavy cream until stiff peaks form (using a cold whisk and a cold bowl for best results).
In a separate bowl, beat the cream cheese, sugar, and peppermint extract until smooth.
Gently fold the whipped cream into the cream cheese mixture until fully combined.
Using a small food-safe paintbrush, paint two stripes of red color gel on the inside of a piping bag fitted with a large round tip. Carefully fill the piping bag with the cheesecake filling.
Pipe a swirl of the peppermint cheesecake filling into the cooled cookie cups. Refrigerate the filled cookie cups until the filling is set, approximately 1-2 hours.
Before serving, sprinkle the tops of the cookie cups with chopped candy canes if desired.
Serve chilled. These cookie cups are best enjoyed within 2-3 days. They can also be frozen for up to 4 weeks (without the chopped candy canes).
- Prep Time: 30 minutes
- Cook Time: 13 minutes
Nutrition
- Calories: 220