Paw Print Peanut Butter Blossom Cookies: A Fun and Delicious Treat
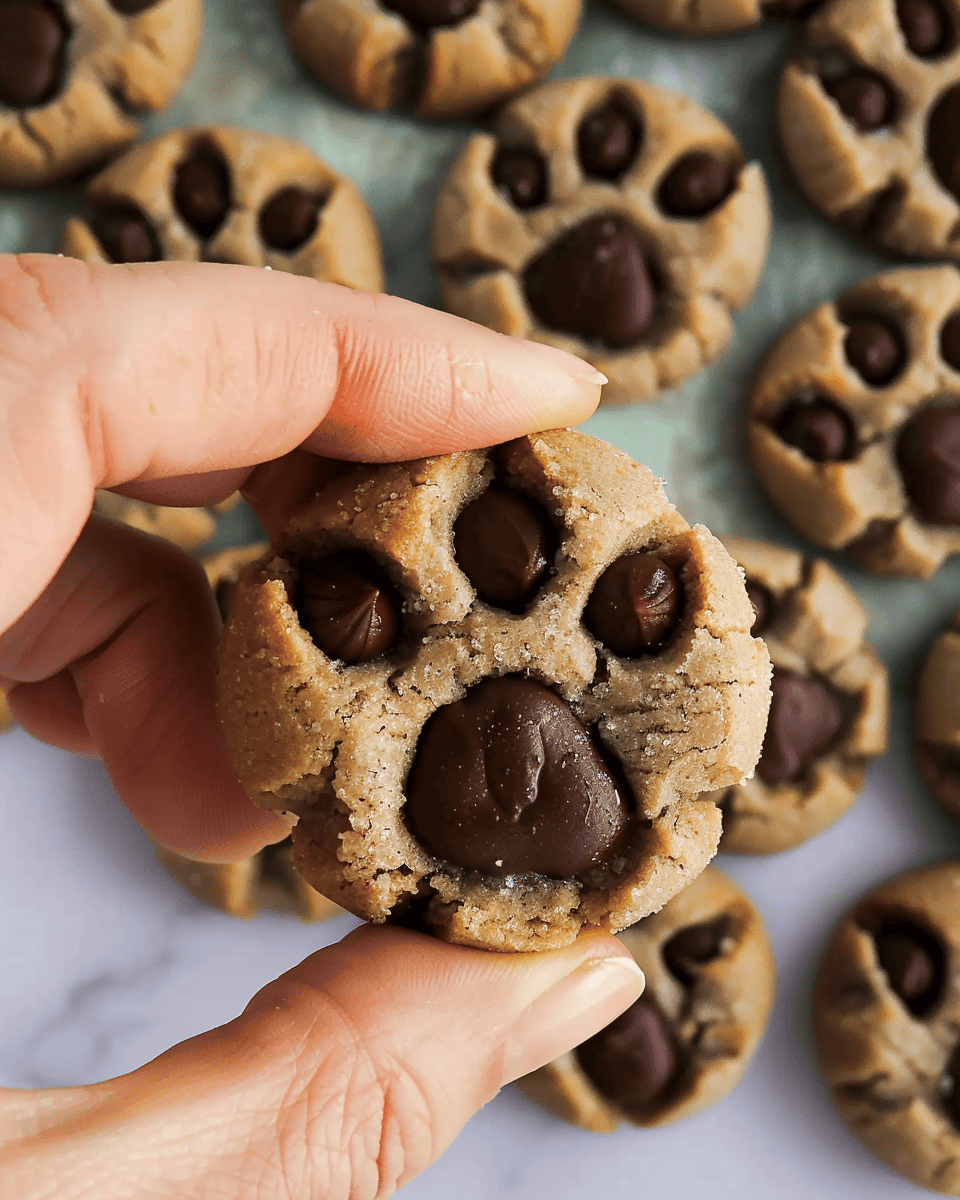
Looking for an adorable, fun, and delicious cookie to bake? These Paw Print Peanut Butter Blossom Cookies are the perfect choice! Combining the classic flavor of peanut butter blossoms with a creative twist, these cookies feature a cute paw print design made with melting chocolate disks and chocolate chips. They’re a fantastic treat for kids, pet lovers, or anyone who enjoys a playful dessert. Plus, they’re as easy to make as they are to eat!
Why You’ll Love This Recipe
These Paw Print Peanut Butter Blossom Cookies are not only visually appealing but also packed with the rich, nutty flavor of peanut butter. The cookies are soft and chewy with just the right amount of sweetness. The chocolate paw print design adds a touch of whimsy and makes them perfect for special occasions like birthday parties, bake sales, or themed events. With simple ingredients and straightforward steps, this recipe is great for baking with kids or when you want to impress with a unique yet classic cookie.
Paw Print Peanut Butter Blossom Cookies Recipe
Ingredients:
- ½ cup butter, softened
- 1 cup creamy peanut butter
- 1 cup granulated sugar
- ½ cup light brown sugar, packed
- 2 large eggs
- ½ teaspoon vanilla extract
- 2 cups all-purpose flour
- 2 teaspoons baking soda
- ½ teaspoon salt
- 48 melting chocolate disks
- 144 chocolate chips
Directions:
- Preheat the Oven
- Preheat your oven to 350°F (175°C) and line a baking sheet with parchment paper.
- Mix the Wet Ingredients
- In a large mixing bowl, cream together the softened butter, creamy peanut butter, granulated sugar, and brown sugar until the mixture is smooth and creamy.
- Add the Eggs
- Mix in the eggs and vanilla extract until well combined and the mixture is light and fluffy.
- Combine the Dry Ingredients
- In a separate bowl, whisk together the flour, baking soda, and salt. Gradually add the dry ingredients to the wet ingredients, mixing just until combined to form a dough.
- Form the Cookies
- Scoop slightly rounded tablespoons of dough and place them onto the prepared baking sheet, leaving about two inches of space between each cookie. For extra sweetness, roll each dough ball in granulated sugar before rolling between your hands to smooth.
- Bake the Cookies
- Bake the cookies in the preheated oven for 7-9 minutes. The cookies should appear puffy and soft, with the center set.
- Create the Paw Print
- Immediately after removing the cookies from the oven, press one melting chocolate disk into the lower center of each cookie. Then, place 3-4 chocolate chips around the disk to form a paw print design.
- Cool the Cookies
- Transfer the cookies to a wire rack to cool completely, allowing the chocolate to set before stacking them for storage.
Recipe Notes:
- Peanut Butter Substitute: You can substitute creamy peanut butter with chunky peanut butter for added texture or use a different nut butter if preferred.
- Chocolate Options: Feel free to use milk, dark, or white chocolate for the paw print designs depending on your taste preferences.
- Make Ahead: These cookies can be made ahead of time and stored in an airtight container for up to a week. They also freeze well, making them a great option for preparing in advance.
Nutritional Information:
- Prep Time: 15 minutes
- Cooking Time: 9 minutes
- Total Time: 24 minutes
- Calories: 160 kcal per cookie
- Servings: 48 cookies
These Paw Print Peanut Butter Blossom Cookies are a fun and delightful twist on a classic cookie. With their adorable design and irresistible flavor, they’re sure to bring a smile to everyone’s face. Whether you’re baking them for a special occasion or just as a treat to enjoy at home, these cookies are guaranteed to be a hit!
Print
Paw Print Peanut Butter Blossom Cookies
- Total Time: 24 minutes
- Yield: 48 1x
Description
Paw Print Peanut Butter Blossom Cookies are the perfect combination of flavor and fun. These soft, chewy peanut butter cookies are topped with sweet chocolate wafers and chocolate chips, arranged in the shape of an adorable paw print. Each bite delivers a perfect balance of peanut butter and chocolate, making them irresistible to both kids and adults.
Ingredients
½ cup butter, softened
1 cup creamy peanut butter
1 cup granulated sugar
½ cup light brown sugar, packed
2 large eggs
½ teaspoon vanilla extract
2 cups all-purpose flour
2 teaspoons baking soda
½ teaspoon salt
48 melting chocolate disks
144 chocolate chips
Instructions
Preheat the Oven: Preheat your oven to 350°F (175°C).
Mix the Wet Ingredients: In a large mixing bowl, cream together the softened butter, peanut butter, granulated sugar, and brown sugar until smooth and creamy.
Add the Eggs: Mix in the eggs and vanilla extract until well combined.
Combine the Dry Ingredients: In a separate small bowl, stir together the flour, baking soda, and salt. Gradually add the flour mixture to the wet ingredients, mixing until just combined.
Form the Cookies: Scoop slightly rounded tablespoons of dough onto a baking sheet, leaving about two inches between each cookie. Optionally, roll the dough balls in additional sugar for extra sweetness, then roll them between your hands until smooth.
Bake the Cookies: Bake the cookies for 7-9 minutes. They should look puffy and soft but set in the center.
Create the Paw Print: Immediately after removing the cookies from the oven, press 1 melting chocolate disk into the lower center of each cookie. Add 3-4 chocolate chips around the disk to form a paw print design.
Cool: Transfer the cookies to a wire rack to cool completely. Allow the chocolate to set before stacking for storage.
- Prep Time: 15 minutes
- Cook Time: 9 minutes
Nutrition
- Calories: 160

