
Apple Slices with Buttery Glaze
Take your apple dessert game to the next level with these Apple Slices! Featuring a flaky, homemade crust filled with sweet apple filling and topped with a buttery glaze, this dessert is a delicious twist on a classic apple pie. Perfect for parties, potlucks, or family gatherings, these apple slices are easy to serve and even easier to enjoy.
Ingredients
For the Dough:
- 2 cups all-purpose flour
- ½ teaspoon baking powder
- ½ teaspoon salt (Diamond kosher salt recommended)
- ¾ cup lard (preferably non-hydrogenated, unprocessed)
- ½ cup water
- 2 egg yolks
- 1 teaspoon lemon juice
- 32 ounces apple dessert filling/topping
For the Glaze:
- 1 cup powdered sugar
- 2 tablespoons melted or softened butter
- ½ teaspoon vanilla extract
- 2 tablespoons whole milk (more as needed for thinning)
Directions
1. Preheat the oven:
Set your oven to 400°F (200°C) and grease a 9×13-inch jelly roll pan. This will help the dough bake evenly and give the apple slices their signature flaky crust.
2. Prepare the dough:
In a large mixing bowl, sift together the flour, baking powder, and salt. Add the lard and cut it into the flour mixture using a pastry cutter or your fingertips until the mixture resembles coarse crumbs.
3. Mix the wet ingredients:
In a measuring cup, whisk together the water, egg yolks, and lemon juice. Gradually pour the liquid mixture over the flour and lard, gently blending with a fork until the dough becomes moist and fully combined.
4. Roll out the dough:
Divide the dough in half. Roll out one half and press it into the bottom of the prepared 9×13-inch jelly roll pan, making sure to press it slightly up the sides.
5. Add the apple filling:
Evenly spread the apple dessert filling over the bottom crust.
6. Top with remaining dough:
Roll out the second half of the dough to cover the apple filling. Carefully flip the dough over the filling, pressing or pinching the edges to seal. If necessary, patch any areas where the dough doesn’t seal completely. Cut a few slits in the top dough to allow steam to escape while baking.
7. Bake the apple slices:
Place the pan in the oven and bake for 40 minutes, rotating the pan halfway through. The crust should turn a beautiful golden brown. Once done, remove from the oven and let it cool on a wire rack.
8. Prepare the glaze:
While the apple slices cool, whisk together the powdered sugar, melted butter, vanilla extract, and milk in a bowl until smooth. Add more milk if needed to create a spreadable consistency.
9. Glaze the apple slices:
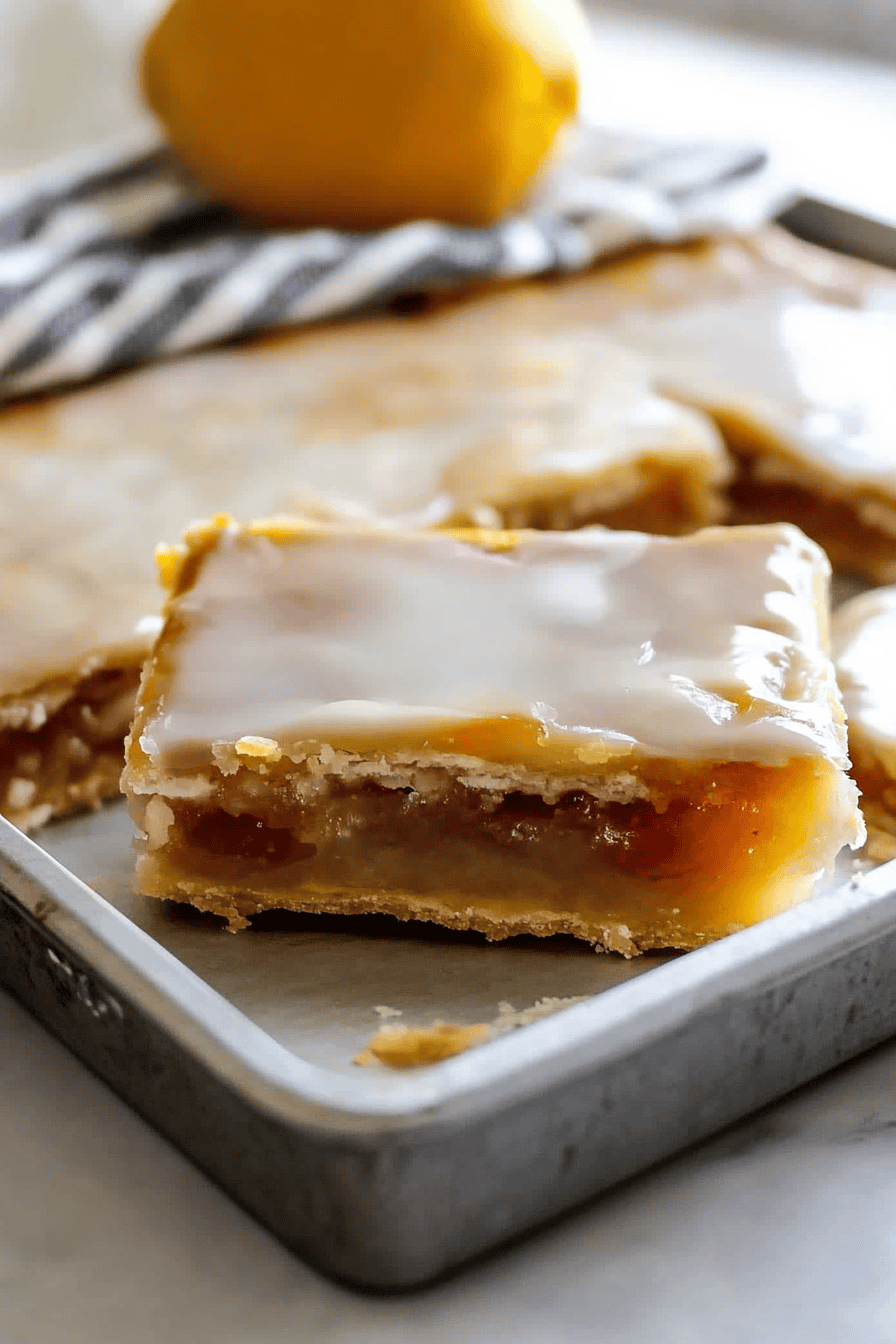
Once the apple slices have cooled, spread the glaze over the top of the crust using an offset spatula. Let the glaze set and harden before cutting the apple slices into 2- or 3-inch squares.
Tips for Perfect Apple Slices:
- Flaky Crust: Cold lard is key for a tender and flaky crust, so don’t skip this step!
- Apple Filling: Feel free to use homemade apple pie filling if you prefer a more customized flavor.
- Glaze: Let the bars cool completely before glazing to ensure the glaze sets properly.
Recipe Details:
- Prep Time: 20 minutes
- Cooking Time: 40 minutes
- Total Time: 1 hour
- Servings: 12 squares
- Calories: 320 kcal per slice
Why You’ll Love These Apple Slices:
These Apple Slices offer the perfect balance between a flaky, buttery crust and a sweet apple filling. The smooth glaze on top adds just the right amount of sweetness, making this dessert a crowd-pleaser at any gathering. Easy to slice, serve, and enjoy, they’re a convenient alternative to traditional apple pie without sacrificing any of the flavor!
Print
Apple Slices
- Total Time: 1 hour
- Yield: 12 1x
Description
These Apple Slices combine a buttery, flaky crust with sweet apple filling and a smooth vanilla glaze, creating a nostalgic and comforting dessert. The tender apple filling pairs beautifully with the crisp crust, while the simple glaze adds just the right touch of sweetness.
Ingredients
For the Dough:
2 cups all-purpose flour
½ teaspoon baking powder
½ teaspoon salt (Diamond kosher salt recommended)
¾ cup lard (preferably non-hydrogenated, unprocessed)
½ cup water
2 egg yolks
1 teaspoon lemon juice
32 ounces apple dessert filling/topping
For the Glaze:
1 cup powdered sugar
2 tablespoons melted or softened butter
½ teaspoon vanilla extract
2 tablespoons whole milk (more as needed for thinning)
Instructions
Preheat the oven to 400°F (200°C). In a large bowl, sift together the flour, baking powder, and salt.
Add the lard to the flour mixture and cut it in using a pastry cutter or your fingertips until the texture resembles coarse crumbs.
In a measuring cup, combine the water, egg yolks, and lemon juice. Pour this mixture over the flour mixture and gently blend with a fork until combined. The dough will be moist.
Divide the dough in half. Roll or pat one half directly into a 9×13-inch jelly roll pan, pressing it slightly up the sides.
Evenly spread the apple dessert filling over the dough.
Roll out the remaining dough to fit the top. Carefully flip it over the apple filling and press or pinch the edges together. If the dough doesn’t seal completely, patch where needed, but ensure the top is fully covered. Cut several slits in the top dough to allow steam to escape.
Bake for 40 minutes, rotating the pan halfway through, until the crust is golden brown. Remove from the oven and cool on a wire rack.
While the apple slices cool, make the glaze. In a bowl, whisk together the powdered sugar, melted butter, vanilla, and milk until smooth. Add more milk if necessary to reach a spreadable consistency.
Spread the glaze over the top of the crust using an offset spatula. Let the glaze set and harden before cutting the apple slices into 2- or 3-inch squares. Enjoy!
- Prep Time: 20 minutes
- Cook Time: 40 minutes
Nutrition
- Calories: 320