
Butterfinger Balls: A Sweet and Crunchy Treat
Introduction
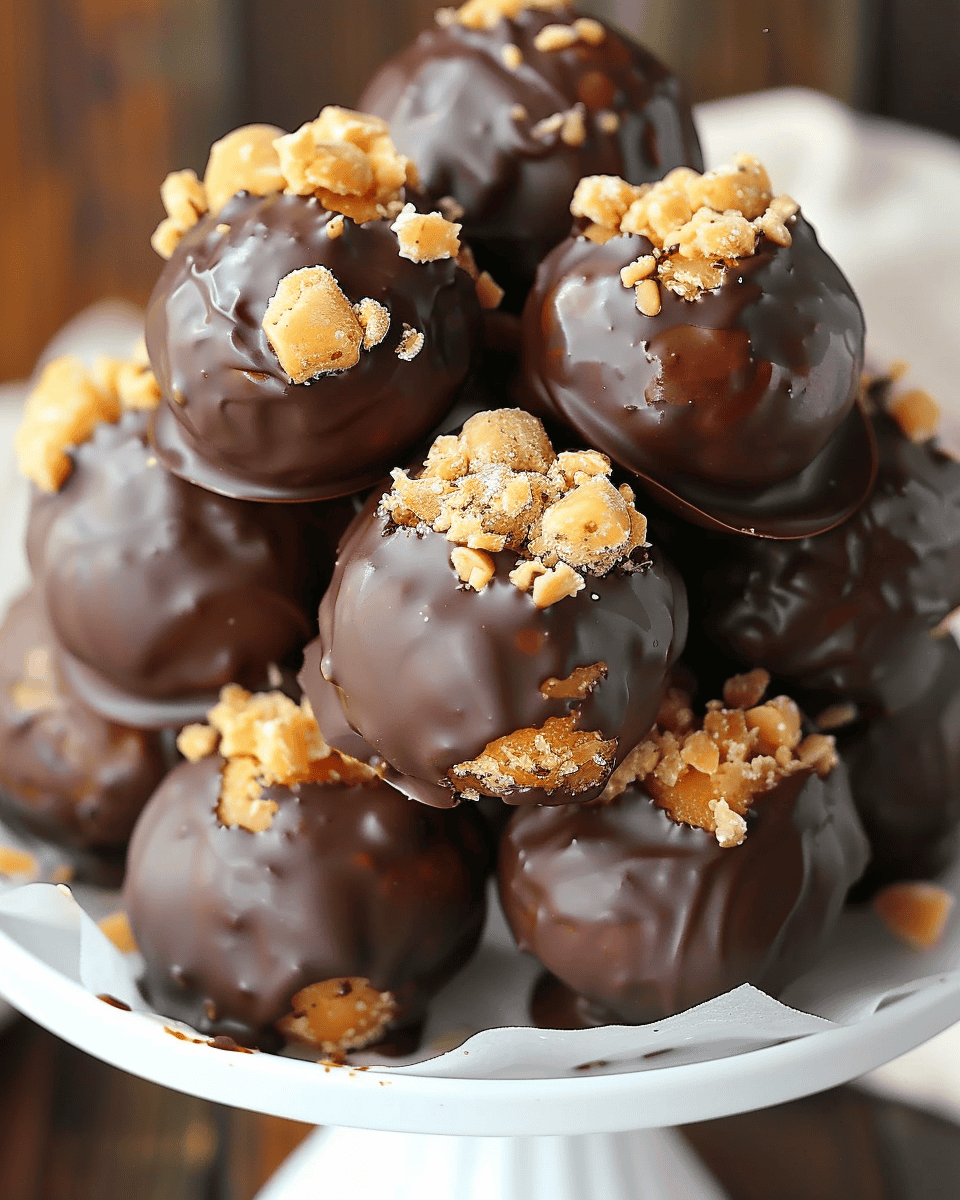
If you’re looking for a delicious and easy no-bake treat, these Butterfinger Balls are the perfect solution! Combining creamy peanut butter, crushed Butterfinger candy bars, and a touch of chocolate, these bite-sized delights are irresistible. Whether you’re preparing them for a party, holiday gathering, or just because you crave something sweet, these Butterfinger Balls will quickly become a favorite. With just a few simple ingredients, you can whip up a batch of these decadent treats in no time!
Ingredients
- 1 cup creamy peanut butter
- 1/4 cup unsalted butter, softened
- 2 cups powdered sugar
- 1 teaspoon vanilla extract
- Pinch of salt
- 6 Butterfinger candy bars, finely crushed
- 12 ounces semisweet or milk chocolate, chopped (optional, for dipping)
Directions
1. Prepare the Peanut Butter Mixture
- In a mixing bowl, combine the creamy peanut butter, softened butter, powdered sugar, vanilla extract, and a pinch of salt.
- Mix until smooth and well combined. You can use an electric mixer for convenience or mix by hand with a spoon or spatula.
2. Fold in the Butterfinger Candy
- Once the peanut butter mixture is smooth, fold in the finely crushed Butterfinger candy bars. Mix until the candy pieces are evenly distributed throughout the peanut butter mixture.
3. Shape the Balls
- Line a baking sheet with parchment paper or wax paper.
- Scoop tablespoon-sized portions of the peanut butter mixture and roll them into balls using your hands.
- Place each ball on the prepared baking sheet, making sure to space them out evenly.
4. (Optional) Dip in Chocolate
- If you want to add an extra layer of indulgence, melt the semisweet or milk chocolate in a small saucepan over low heat, stirring constantly until smooth. Alternatively, you can melt the chocolate in the microwave in short intervals, stirring between each interval.
- Use a fork or dipping tools to coat each peanut butter ball in the melted chocolate. Tap off any excess chocolate and place the coated balls back onto the baking sheet.
5. Chill the Butterfinger Balls
- Once all the balls are shaped (and dipped in chocolate, if desired), refrigerate them for about 30 minutes, or until the chocolate has set and the balls are firm.
6. Serve and Store
- After the chocolate has hardened, remove the Butterfinger Balls from the refrigerator.
- Serve immediately or store them in an airtight container for later enjoyment. They will stay fresh for up to a week when stored in a cool place.
Recipe Details
- Prep Time: 20 minutes
- Chill Time: 30 minutes
- Total Time: 50 minutes
- Servings: 24 Butterfinger Balls
- Calories: 190 kcal per serving
Tips for Success
- Crushing the Butterfingers: You can crush the Butterfinger candy bars by placing them in a resealable bag and using a rolling pin or heavy object to break them into fine pieces.
- Chocolate Coating: If you’re dipping the balls in chocolate, use a fork or dipping tool to gently lower each ball into the melted chocolate. Tap off any excess chocolate to avoid thick coatings.
- Storing the Butterfinger Balls: Keep these sweet treats stored in an airtight container in the refrigerator. You can also freeze them for up to a month if you want to make them ahead of time.
Final Thoughts
Butterfinger Balls are a delightful combination of creamy peanut butter, crunchy Butterfinger candy, and a luscious chocolate coating (if you choose to dip them!). They’re easy to make and perfect for sharing with friends and family—or for enjoying as a personal indulgence. These no-bake treats are sure to become a go-to favorite whenever you need a quick, satisfying dessert. So grab your ingredients, whip up a batch, and savor each bite of these delectable Butterfinger Balls!

Butterfinger Balls
- Total Time: 50 minutes (plus chilling time)
- Yield: 24 1x
Description
These Butterfinger Balls are a delightful mix of creamy peanut butter, crunchy Butterfinger candy pieces, and smooth chocolate. Each bite offers the perfect combination of sweet, salty, and crunchy textures that make them irresistible. The peanut butter filling is perfectly balanced with the sweet and nutty Butterfinger candy, while the chocolate coating adds a rich and indulgent finish.
Ingredients
1 cup creamy peanut butter
1/4 cup unsalted butter, softened
2 cups powdered sugar
1 teaspoon vanilla extract
Pinch of salt
6 Butterfinger candy bars, finely crushed
12 ounces semisweet or milk chocolate, chopped (optional, for dipping)
Instructions
In a mixing bowl, combine the creamy peanut butter, softened butter, powdered sugar, vanilla extract, and a pinch of salt. Mix until smooth and well combined. You can use an electric mixer or mix by hand with a spoon or spatula.
Fold in the finely crushed Butterfinger candy bars, mixing until they are evenly distributed throughout the peanut butter mixture.
Line a baking sheet with parchment paper or wax paper.
Scoop tablespoon-sized portions of the peanut butter mixture and roll them into balls using your hands. Place the balls on the prepared baking sheet.
If desired, melt the semisweet or milk chocolate in a small saucepan over low heat, stirring constantly until smooth. Alternatively, you can melt the chocolate in the microwave in short intervals, stirring between each interval.
Dip each peanut butter ball into the melted chocolate, using a fork or dipping tools to coat evenly. Tap off any excess chocolate and place the coated balls back onto the baking sheet.
Refrigerate the Butterfinger Balls for about 30 minutes, or until the chocolate is set.
Once the chocolate has hardened, remove the Butterfinger Balls from the refrigerator and store them in an airtight container.
- Prep Time: 20 minutes
Nutrition
- Calories: 190