Description
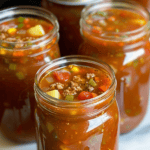
Discover the comforting flavors of the Hearty Garden Hamburger Soup, a robust dish filled with lean ground beef and a colorful array of garden-fresh vegetables. Ideal for canning, this soup ensures that the taste of a garden harvest can be savored year-round. Beyond its delightfully hearty taste, the soup boasts a process designed for safe, long-term storage, making it the perfect wholesome meal for any season.
Ingredients
Scale
- 5 pounds lean ground beef
- 6 cups assorted garden vegetables, chopped (e.g., carrots, peas, green beans)
- 8 cups beef broth
- 6 cups tomato juice
- 3 cups potatoes, cubed
- 6 cups crushed or diced tomatoes
- 1 1/2 cups chopped celery
- 1 1/2 cups diced onion
- 2 teaspoons salt (adjust to taste)
- 1 teaspoon ground black pepper
Instructions
- Step 1: Prepare Jars and Equipment
- Begin by diligently washing and sterilizing the jars along with all necessary canning equipment such as caps and rings to guarantee safety and extend the shelf-life of your canned soup.
- Step 2: Cook the Hamburger
- Brown the ground beef directly in a deep canning pot or large saucepan. Drain the excess grease after browning if necessary to keep the soup lean and flavorful.
- Step 3: Combine and Season Ingredients
- To the browned beef, add the chopped vegetables. Season with salt and pepper, and feel free to include other spices according to your preference. Stir the mixture well to evenly distribute the flavors.
- Step 4: Heat and Pour the Soup
- Add the beef broth, tomato juice, and crushed tomatoes to the pot. Bring the mixture to a boil, then reduce heat slightly to ensure everything is thoroughly heated. Spoon the hot soup into sterilized jars, leaving adequate space at the top for expansion.
- Step 5: Seal the Jars
- Wipe the rims of the jars clean, place the lids on top and tighten the rings. Ensure that they are snug but not overly tight.
- Step 6: Pressure Can the Soup
- Position the sealed jars in the pressure canner with an adequate water bath and follow the pressure canning guidelines specified in your canner’s manual. Process according to the size of your jars and your altitude for safety.
