Mini No-Bake Oreo Cheesecakes: A Delightful Dairy-Free Treat
Craving a decadent dessert that’s both indulgent and easy to make? These Mini No-Bake Oreo Cheesecakes are the perfect solution. With a rich, creamy filling and a crunchy Oreo base, these cheesecakes are not only delicious but also dairy-free, making them a great option for those with dietary restrictions. Whether you’re hosting a party or simply treating yourself, these mini cheesecakes are sure to impress.
Ingredients
For the Base:
- 150g Oreo Cookies
- 50g dairy-free butter or margarine
For the Cheesecake Filling:
- 260g dairy-free whipping cream (1 pot of Elmlea Plant-Based Alternative Double Cream)
- 160g dairy-free cream cheese
- 8 Oreo cookies, finely blended
- 20g dairy-free whipping cream
For Decoration:
- 4 Oreo cookies, for decoration
Instructions
1. Prepare the Oreo Base
- Melt the Butter:
In a small saucepan, melt 50g of dairy-free butter or margarine over low heat. Once fully melted, remove from heat and pour into a medium-sized, heat-proof mixing bowl. - Make the Cookie Crumbs:
Add 150g of Oreo cookies to a blender or food processor and blend until you achieve a fine crumb texture. Pour the cookie crumbs into the melted butter and stir until the mixture resembles wet sand. It should hold its shape when pressed between your fingers. - Form the Base:
Press some of the cookie mixture into each cup of a cookie tin, ensuring it’s compacted well using clean hands. The more compact, the less likely it is to crumble later. Place the tin in the freezer to firm up while you prepare the filling.
2. Prepare the Cheesecake Filling
- Whip the Cream and Cream Cheese:
In a medium-sized bowl, combine 260g of dairy-free whipping cream and 160g of dairy-free cream cheese. Start whipping on low speed to prevent splashing, then increase to high speed. Whip until the mixture is thick and creamy, about 5 minutes. You can use a stand mixer or a hand whisk for this step. - Incorporate the Oreo Crumbs:
Add the finely blended 8 Oreo cookies to the whipped mixture and whip until fully combined. The mixture should be smooth and well-mixed. - Pipe the Filling:
Transfer the cheesecake filling to a piping bag fitted with a large round tip nozzle (or simply snip off the tip of the piping bag). Pipe the filling evenly into each prepared cookie cup, leveling off the tops with an offset spatula.
3. Freeze and Finish
- Freeze the Cheesecakes:
Place the cheesecakes into the freezer for 4 hours or until firm to the touch. If you’re using push-up tins, release the cheesecakes by pushing up the bases of the tins. Make sure the cheesecakes are firm enough; otherwise, they won’t come out neatly. - Prepare the Whipped Cream Topping:
Once the cheesecakes are firm, move them to the fridge to defrost slightly. In the meantime, whip 20g of additional dairy-free whipping cream in a bowl until thick. Transfer the whipped cream to a piping bag fitted with an open star tip nozzle. - Decorate:
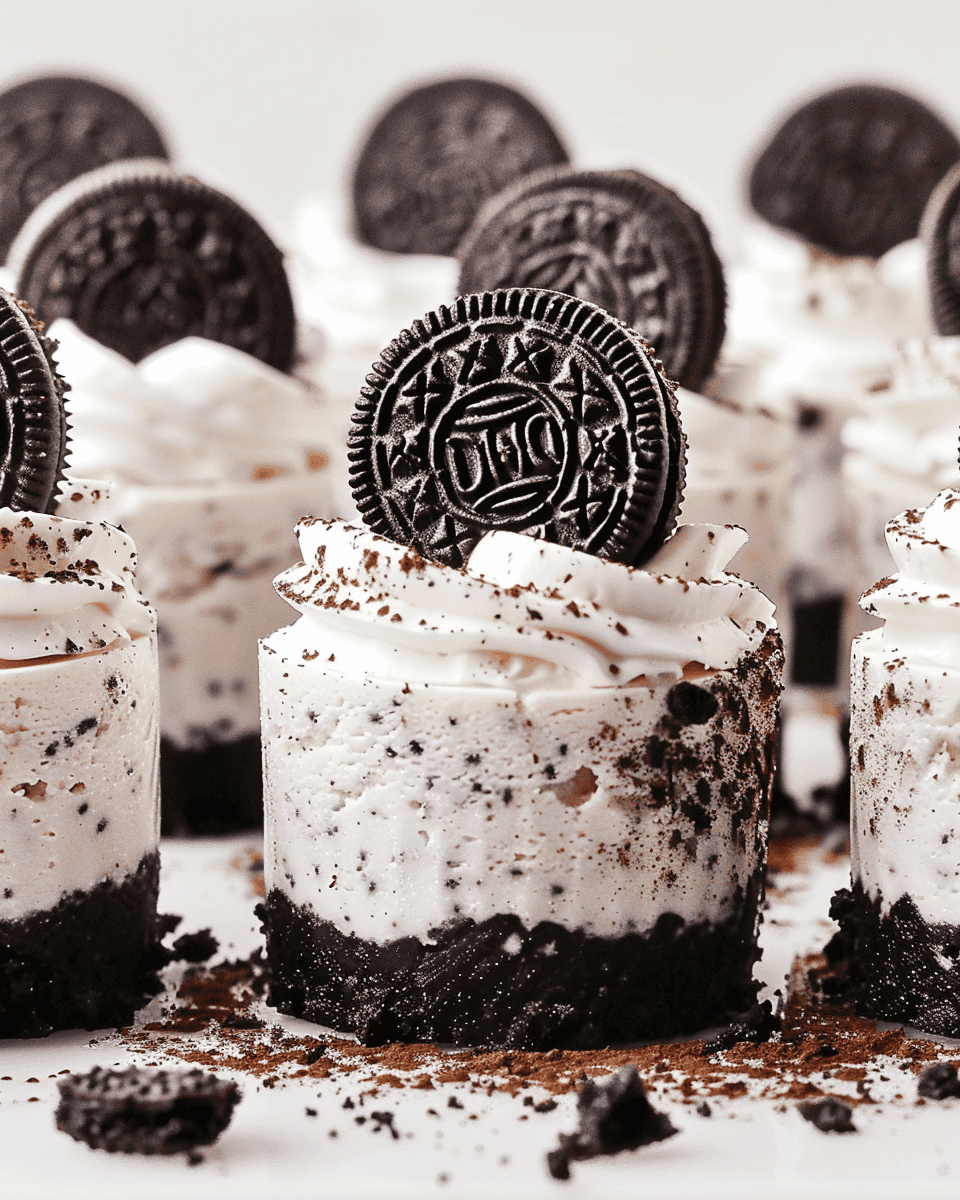
Pipe a swirl of whipped cream on top of each cheesecake. For the final touch, decorate each cheesecake with half an Oreo cookie and some cookie crumbs.
Serving and Storage
- Serve:
Serve these mini Oreo cheesecakes chilled for the best texture and flavor. They’re perfect for individual servings at parties or as a delightful after-dinner treat. - Storage:
Store any leftover cheesecakes in an airtight container in the refrigerator for up to 3 days. They also freeze well if you want to save some for later!
Conclusion
These Mini No-Bake Oreo Cheesecakes are a perfect blend of creamy, crunchy, and chocolaty goodness, all in a convenient, dairy-free format. With minimal prep time and no baking required, they’re an easy yet impressive dessert that’s sure to satisfy your sweet tooth. Whether you’re catering to dietary needs or just looking for a delicious treat, these cheesecakes are a must-try.
Prep Time: 20 minutes | Freezing Time: 4 hours | Total Time: 4 hours 20 minutes
Servings: 12 mini cheesecakes | Calories: 220 Kcal per serving

Mini No-Bake Oreo Cheesecakes
- Total Time: 4 hours 20 min
- Yield: 12 1x
Description
Mini No-Bake Oreo Cheesecakes are a delightful vegan dessert featuring a rich and creamy dairy-free cheesecake filling nestled atop a crunchy Oreo cookie crust. These individual-sized treats are perfect for any occasion, offering the classic flavors of Oreos in a smooth, melt-in-your-mouth cheesecake that’s completely dairy-free. Topped with a swirl of dairy-free whipped cream and garnished with a mini Oreo and cookie crumbles, these cheesecakes are as beautiful as they are delicious. No baking required!
Ingredients
For the base:
150g Oreo Cookies
50g dairy-free butter or margarine
For the cheesecake filling:
260g dairy-free whipping cream (1 pot of Elmlea Plant-Based Alternative Double Cream)
160g dairy-free cream cheese
8 Oreo cookies, finely blended
20g dairy-free whipping cream
4 Oreo cookies, for decoration
Instructions
Base Preparation:
Add the dairy-free butter or margarine to a small saucepan. Heat over low until fully melted. Remove from the heat and pour into a medium-sized, heat-proof mixing bowl.
Add the Oreo cookies to a blender or food processor and blend until fine. Pour the cookie crumbs into the melted butter and stir together until it resembles wet sand. It should hold its shape when pressed between your fingers.
Press some of the mixture into each cookie cup tin, ensuring it’s compacted well using clean hands. The more compact, the less likely it will crumble. Place the tin in the freezer while you prepare the filling.
Cheesecake Filling:
In a medium-sized bowl, combine the dairy-free whipping cream and cream cheese. Start whipping on low speed to prevent splashing, then increase to high speed. Whip until thick and creamy, about 5 minutes. This can be done with a stand mixer or a hand whisk.
Add the finely blended Oreo cookies to the whipped mixture and whip until fully combined.
Transfer the cheesecake filling to a piping bag fitted with a large round tip nozzle (or simply snip off the tip of the piping bag). Pipe the filling evenly into each prepared cookie cup. Level off the tops with an offset spatula.
Place the cheesecakes into the freezer for 4 hours or until firm to the touch. If using push-up tins, release the cheesecakes by pushing up the bases of the tins. If the cheesecakes haven’t set firm, they won’t come out neatly.
Once firm, move the cheesecakes to the fridge to defrost slightly while you prepare the whipped cream swirl.
Whip the additional dairy-free whipping cream in a bowl until thick. Transfer to a piping bag fitted with an open star tip nozzle. Pipe a swirl of cream on top of each cheesecake.
Decorate with half an Oreo cookie and some cookie crumbs on each cheesecake. Enjoy!
- Prep Time: 20 min
Nutrition
- Calories: 220

