
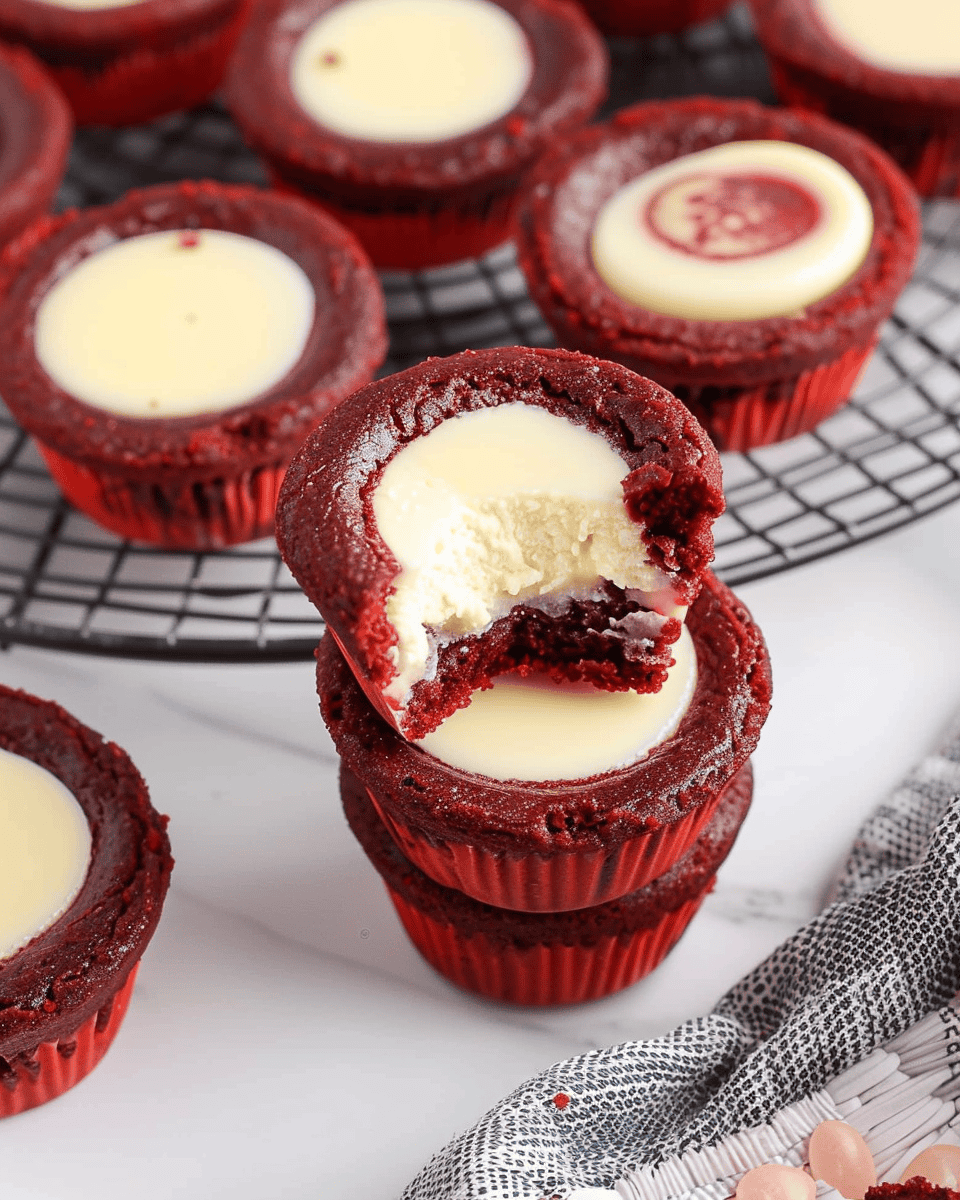
Mini Red Velvet Cheesecakes Recipe
Looking for a bite-sized dessert that’s rich, indulgent, and perfect for any occasion? These Mini Red Velvet Cheesecakes combine the classic flavors of red velvet cake with creamy cheesecake in a delightful little package. With a smooth, velvety texture and a hint of cocoa, these mini cheesecakes are sure to impress at parties, holiday gatherings, or whenever you need a sweet treat.
Ingredients:
For the Red Velvet Base:
- 1 cup all-purpose flour
- ¼ cup + 1 tablespoon unsweetened cocoa powder
- ¾ cup salted sweet cream butter, melted and cooled
- 1¼ cups granulated sugar
- 1 tablespoon red gel food coloring (Sunny Side Up Bakery brand recommended)
- 2 teaspoons pure vanilla extract
- 2 large eggs, room temperature and beaten
For the Cheesecake Filling:
- 8 ounces cream cheese, softened
- ¼ cup granulated sugar
- 1 teaspoon pure vanilla extract
- 1 large egg yolk
Directions:
1. Preheat the Oven:
- Preheat your oven to 350°F (175°C). Grease a mini muffin pan with nonstick cooking spray and set aside.
2. Prepare the Red Velvet Base:
- In a small mixing bowl, whisk together the all-purpose flour and unsweetened cocoa powder. Set the dry mixture aside.
- In a medium-sized mixing bowl, combine the melted butter, granulated sugar, red food coloring, vanilla extract, and beaten eggs. Stir until the mixture is well combined.
- Gradually add the flour and cocoa mixture into the wet ingredients, stirring gently. Be careful not to overmix the batter.
3. Make the Cheesecake Filling:
- In another medium-sized mixing bowl, use a handheld mixer to beat the softened cream cheese on medium-high speed for about 1 minute until smooth.
- Add the granulated sugar and vanilla extract to the cream cheese, and continue mixing for another 1-1½ minutes until fully combined.
- Add the egg yolk to the cream cheese mixture, mixing just until no yellow streaks remain.
4. Assemble the Mini Cheesecakes:
- Transfer the cheesecake filling into a disposable piping bag or a quart-size ziplock bag.
- Place 1 tablespoon of the red velvet base into each cavity of the greased mini muffin pan.
- Snip off the end of the piping bag (or ziplock bag), and pipe about 2 teaspoons of the cheesecake filling into the center of each red velvet base.
5. Bake:
- Bake the mini red velvet cheesecakes in the preheated oven for 8-9 minutes, or until the edges of the red velvet base are set and the cheesecake filling is slightly firm.
- Remove the mini cheesecakes from the oven and allow them to cool in the pan for 20-30 minutes.
- Once they’ve cooled slightly, transfer the cheesecakes to a wire rack to cool completely.
Recipe Tips:
- Don’t Overmix: When combining the flour mixture into the wet ingredients, stir just until the ingredients are incorporated to maintain a soft texture.
- Chill Time: For best results, chill the mini cheesecakes in the fridge for about 30 minutes before serving to let the flavors meld.
- Decorate: Optionally, sprinkle with powdered sugar or top with a small dollop of whipped cream for an elegant finish.
Quick Stats:
- Prep Time: 15 minutes
- Cook Time: 9 minutes
- Total Time: 45 minutes (including cooling time)
- Calories: 150 kcal per serving
- Servings: 24 mini cheesecake bites
These Mini Red Velvet Cheesecakes are a delightful twist on two classic desserts. The rich red velvet base paired with creamy cheesecake creates a flavor combination that’s simply irresistible. Whether you’re hosting a holiday party or just looking for a special treat, these mini cheesecakes are guaranteed to be a hit!
Print
Mini Red Velvet Cheesecake
- Total Time: 9 minutes
- Yield: 24 1x
Description
These Mini Red Velvet Cheesecake Bites are a delightful combination of rich red velvet and creamy cheesecake, packed into bite-sized treats. With their vibrant red color and creamy center, they’re sure to stand out at any dessert table. The red velvet base is perfectly balanced with the light, velvety cheesecake filling, creating an irresistible contrast of textures and flavors.
Ingredients
Red Velvet Base:
1 cup all-purpose flour
¼ cup + 1 tablespoon unsweetened cocoa powder
¾ cup salted sweet cream butter, melted and cooled
1¼ cups granulated sugar
1 tablespoon red gel food coloring (Sunny Side Up Bakery brand recommended)
2 teaspoons pure vanilla extract
2 large eggs, room temperature and beaten
Cheesecake Filling:
8 ounces cream cheese, softened
¼ cup granulated sugar
1 teaspoon pure vanilla extract
1 large egg yolk
Instructions
Preheat the oven to 350°F (175°C). Grease a mini muffin pan with nonstick cooking spray and set aside.
In a small mixing bowl, whisk together the flour and unsweetened cocoa powder. Set aside.
In a medium-sized mixing bowl, combine the melted butter, sugar, red food coloring, vanilla extract, and eggs. Stir until well mixed.
Gradually stir in the flour mixture, making sure not to overmix.
In another medium-sized mixing bowl, beat the cream cheese using a handheld mixer at medium-high speed for 1 minute.
Add the sugar and vanilla extract to the cream cheese, and mix for another 1-1½ minutes until fully combined.
Add the egg yolk to the cream cheese mixture, and mix just until no yellow streaks remain.
Transfer the cheesecake mixture into a disposable piping bag or a quart-size ziplock bag.
Add 1 tablespoon of the red velvet base to each mini muffin cavity in the prepared pan.
Snip off the end of the piping bag or ziplock bag, and pipe about 2 teaspoons of cheesecake filling into the center of each red velvet base.
Bake for 8-9 minutes. Remove from the oven and allow the mini cheesecakes to cool in the pan for 20-30 minutes before transferring them to a wire rack to cool completely.
- Prep Time: 15 minutes
- Cook Time: 9 minutes
Nutrition
- Calories: 150