
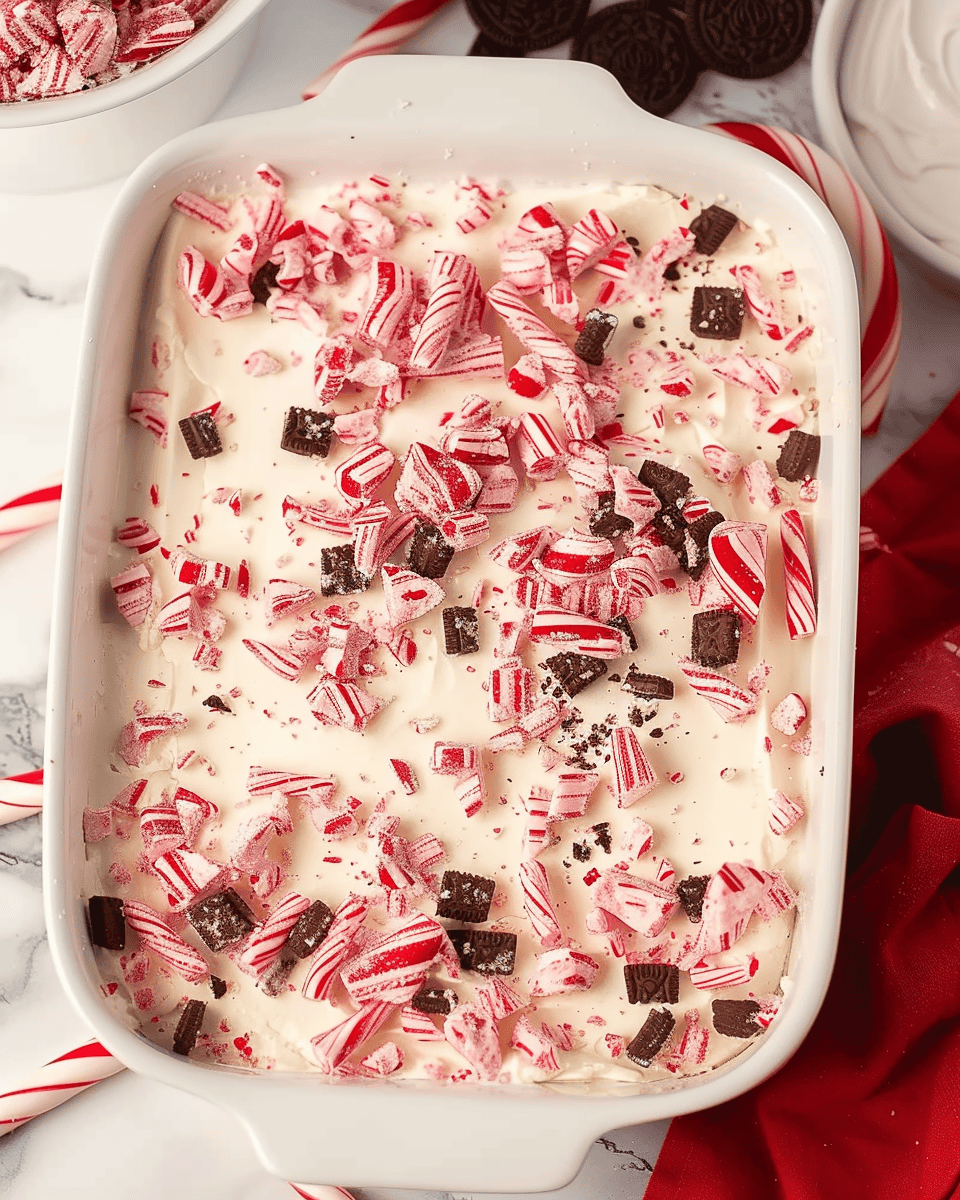
No-Bake Peppermint Oreo Cheesecake: A Festive and Easy Holiday Treat
The holiday season calls for indulgent desserts that are as delightful to look at as they are to eat. This No-Bake Peppermint Oreo Cheesecake is the perfect combination of rich, creamy cheesecake and refreshing peppermint, all layered over a crunchy Oreo crust. With no need for an oven, this dessert is incredibly easy to make, making it an ideal choice for your next holiday gathering or any time you crave a festive, sweet treat.
Ingredients
- 3 cups Oreo cookie crumbs (about 30 cream-filled cookies)
- ½ cup unsalted butter, melted
- 2 (8-ounce) packages cream cheese, softened
- ¼ cup granulated sugar
- 1 teaspoon vanilla extract
- ½ teaspoon peppermint extract
- 2 cups Andes Peppermint Crunch Chips, divided
- 2 teaspoons shortening
- 2 (8-ounce) containers Cool Whip, thawed
Directions
- Prepare the Crust:
- In a medium bowl, combine the Oreo cookie crumbs and melted butter. Stir until the crumbs are fully coated and the mixture resembles wet sand. Press the mixture firmly into the bottom of a 9×13-inch baking dish to create an even crust. Place the crust in the refrigerator to chill while you prepare the filling.
- Make the Filling:
- In a large mixing bowl, beat the softened cream cheese, granulated sugar, vanilla extract, and peppermint extract together until the mixture is smooth and creamy. Make sure there are no lumps in the cream cheese mixture.
- Melt the Peppermint Chips:
- Place 1 cup of Andes Peppermint Crunch Chips and the shortening in a microwave-safe bowl. Microwave for 30 seconds, then stir. Continue heating in 20-30 second intervals, stirring between each, until the mixture is fully melted and smooth.
- Combine and Fold:
- Pour the melted peppermint mixture into the cream cheese mixture and beat until well combined. Gently fold in 8 ounces of Cool Whip until the filling is light and fluffy.
- Assemble the Cheesecake:
- Remove the prepared crust from the refrigerator. Spoon the cream cheese mixture evenly over the Oreo crust, spreading it out to the edges of the baking dish. Next, spread the remaining container of Cool Whip over the top of the cream cheese layer, creating a smooth finish.
- Top and Chill:
- Sprinkle the remaining 1 cup of Andes Peppermint Crunch Chips evenly over the top layer of Cool Whip. Cover the dish and refrigerate for 1-2 hours to allow the cheesecake to set.
- Serve:
- Once the cheesecake is set, slice it into 24 squares for easy serving. Enjoy this refreshing and creamy dessert, and be prepared for it to disappear quickly! Store any leftovers in a sealed container in the refrigerator.
Tips for Success
- Press the crust firmly: Make sure the Oreo crust is firmly pressed into the pan to prevent it from crumbling when you slice the cheesecake.
- Use softened cream cheese: This ensures a smooth filling without any lumps.
- Chill time is crucial: Allowing the cheesecake to chill for at least 1-2 hours is essential for it to set properly and hold its shape.
Nutritional Information
- Prep Time: 20 minutes
- Chilling Time: 1-2 hours
- Total Time: 1 hour 20 minutes
- Calories: 350 kcal per serving
- Servings: 24 squares
This No-Bake Peppermint Oreo Cheesecake is a show-stopping dessert that’s as easy to make as it is delicious. The combination of peppermint, chocolate, and creamy cheesecake is a festive treat that’s perfect for the holiday season. Whether you’re hosting a party or simply want to treat your family, this dessert is sure to be a hit. Enjoy the festive flavors and the compliments that are sure to follow!
No Bake Peppermint Oreo Cheesecake
- Total Time: 1 hour 20 minutes (including chilling time)
- Yield: 24 1x
Description
These No Bake Peppermint Oreo Cheesecake Squares are the perfect dessert for your holiday gatherings. The rich Oreo crust pairs beautifully with the creamy, mint-flavored cheesecake filling, while the Cool Whip topping adds a light and airy finish. The addition of Andes Peppermint Crunch Chips gives each bite a delightful burst of peppermint flavor and a festive look.
Ingredients
3 cups Oreo cookie crumbs (about 30 cream-filled cookies)
½ cup unsalted butter, melted
2 (8-ounce) packages cream cheese, softened
¼ cup granulated sugar
1 teaspoon vanilla extract
½ teaspoon peppermint extract
2 cups Andes Peppermint Crunch Chips, divided
2 teaspoons shortening
2 (8-ounce) containers Cool Whip, thawed
Instructions
Prepare the Crust:
Combine the Oreo cookie crumbs and melted butter in a bowl. Mix until the crumbs are fully coated with butter. Press the mixture firmly into the bottom of a 9×13-inch baking dish. Refrigerate the crust while you prepare the filling.
Make the Filling:
In a large bowl, beat the softened cream cheese, granulated sugar, vanilla extract, and peppermint extract together until smooth and creamy.
Melt the Peppermint Chips:
Place 1 cup of Andes Peppermint Crunch Chips and the shortening in a microwave-safe bowl. Microwave for 30 seconds, then stir. Heat for an additional 20-30 seconds and stir until the mixture is fully melted and smooth.
Combine and Fold:
Immediately pour the melted peppermint mixture into the cream cheese mixture and beat until well combined. Gently fold in 8 ounces of Cool Whip until the mixture is fully incorporated.
Assemble the Cheesecake:
Spoon the cream cheese mixture evenly over the prepared Oreo crust, spreading it out to the edges. Spread the remaining container of Cool Whip over the top of the cheesecake layer.
Top and Chill:
Sprinkle the remaining Andes Peppermint Crunch Chips over the top of the Cool Whip layer. Refrigerate the cheesecake for 1-2 hours to allow it to set.
Serve:
Once set, cut the cheesecake into 24 squares. Store any leftovers in a sealed container in the refrigerator.
- Prep Time: 20 minutes
Nutrition
- Calories: 350