
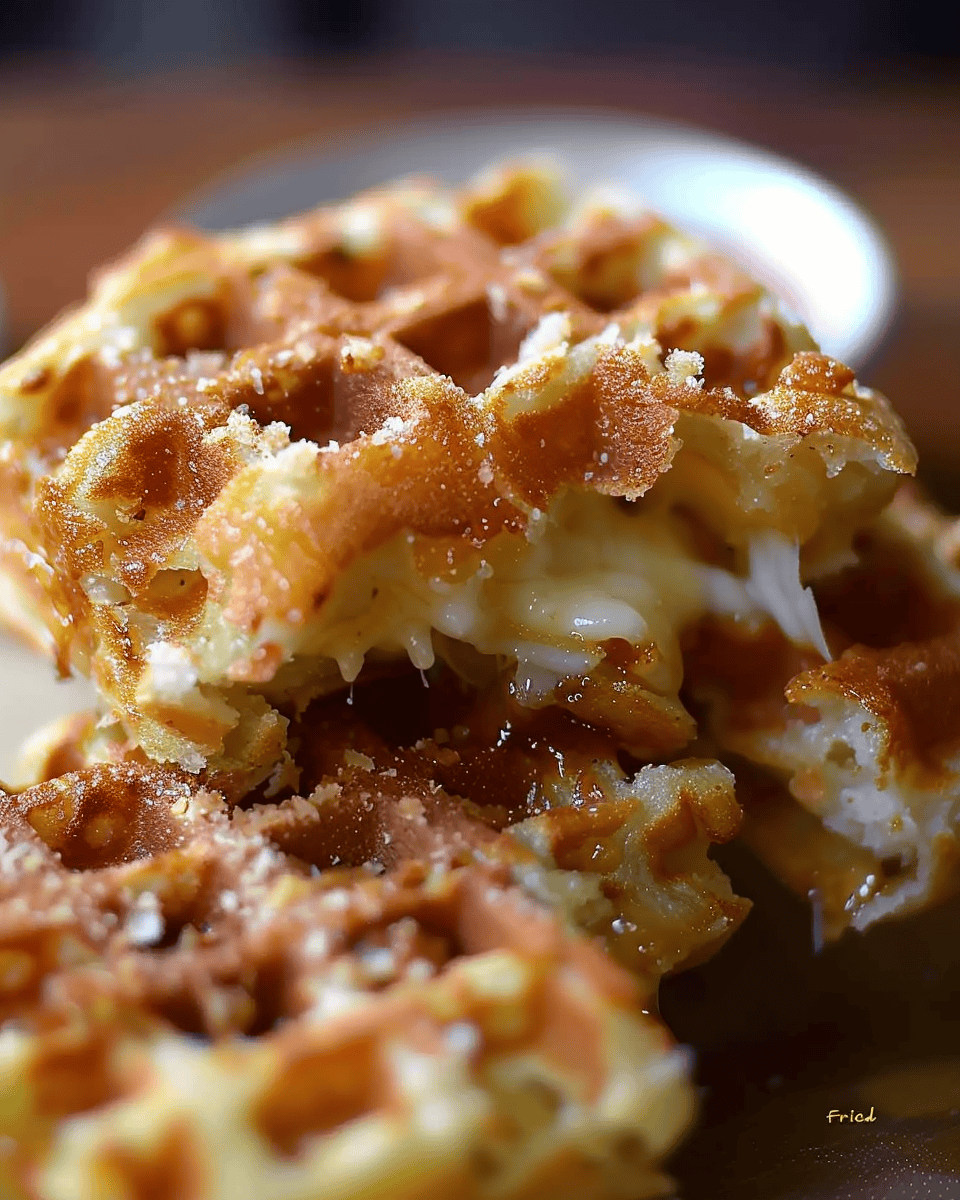
Waffle Iron “Fried” Cheese (Queso Frito): A Crispy, Cheesy Delight
If you’re a fan of crispy, melty cheese, then this Waffle Iron “Fried” Cheese (Queso Frito) is about to become your new favorite snack. This recipe takes the concept of traditional fried cheese and gives it a fun twist by using a waffle iron. The result? Crispy, golden-brown cheese with a perfectly melted center, all without the need for deep frying. It’s a quick, easy, and delicious treat that’s perfect for snacking or as a fun appetizer.
Ingredients
- 3 tablespoons all-purpose flour
- 1/2 teaspoon paprika, or a pinch of cayenne pepper
- 1/2 pound low-moisture mozzarella, sliced about 1/2 inch thick
- 2 large eggs, beaten
- 1/2 cup bread crumbs
- Nonstick cooking spray
- Salsa, for serving (optional)
Directions
1. Preheat Waffle Iron:
Start by preheating your waffle iron. If your waffle iron has temperature controls, set it to medium heat. This will ensure the cheese gets crispy on the outside while melting perfectly on the inside.
2. Prepare Coating Stations:
Set up your coating stations by placing the flour mixed with paprika or cayenne on one plate. In a second plate or bowl, place the beaten eggs. Finally, add the bread crumbs to a third plate. This setup makes it easy to coat the cheese slices efficiently.
3. Coat the Cheese:
Working with one slice of mozzarella at a time, coat the cheese first in the flour mixture, ensuring it’s evenly covered. Next, dip the flour-coated cheese into the beaten eggs, letting any excess drip off. Finally, press the cheese into the bread crumbs, making sure it’s fully coated on all sides. The bread crumbs will add that irresistible crunch once cooked.
4. Cook the Cheese:
Spray both sides of the waffle iron generously with nonstick cooking spray. Place as many coated cheese slices as will fit in the waffle iron without overcrowding. Close the lid and cook for about 1 minute, or until the bread crumbs are golden brown and the cheese is starting to melt. The waffle iron will create a unique texture with crispy edges and a gooey center.
5. Repeat:
Repeat the coating and cooking process with any remaining cheese slices. Depending on the size of your waffle iron, you may need to do this in batches.
6. Serve:
Serve the waffle iron “fried” cheese hot, either on its own or with salsa for dipping. The salsa adds a tangy contrast to the rich, melty cheese, making it the perfect accompaniment.
Recipe Notes
This Waffle Iron “Fried” Cheese is not only easy to make but also highly customizable. You can experiment with different cheeses, such as cheddar or gouda, for varied flavors. If you like a bit more heat, feel free to increase the amount of cayenne pepper or add some chili flakes to the bread crumbs.
This dish is best enjoyed fresh off the waffle iron, while the cheese is still hot and gooey. It’s an excellent snack for game days, parties, or any time you’re craving something cheesy and delicious.
Nutrition
- Prep Time: 10 minutes
- Cooking Time: 10 minutes
- Total Time: 20 minutes
- Calories: 180 kcal per serving
- Servings: 4 servings
With this Waffle Iron “Fried” Cheese recipe, you can enjoy a crispy, cheesy treat that’s quick and easy to prepare. It’s a fun twist on traditional fried cheese, and it’s sure to be a hit with both kids and adults alike. Give it a try the next time you’re in the mood for a tasty, indulgent snack!
Print
Waffle Iron “Fried” Cheese (Queso Frito)
- Total Time: 20 minutes
- Yield: 4 1x
Description
Waffle Iron “Fried” Cheese, or Queso Frito, is a delightful twist on traditional fried cheese that’s easy to make and bursting with flavor. Using a waffle iron to cook the cheese creates a perfectly crispy crust while keeping the inside deliciously gooey. This method is not only quicker but also eliminates the need for deep frying, making it a lighter yet still indulgent snack.
Ingredients
3 tablespoons all-purpose flour
1/2 teaspoon paprika, or a pinch of cayenne pepper
1/2 pound low-moisture mozzarella, sliced about 1/2 inch thick
2 large eggs, beaten
1/2 cup bread crumbs
Nonstick cooking spray
Salsa, for serving (optional)
Instructions
Preheat Waffle Iron: Preheat your waffle iron. If your waffle iron has temperature controls, set it to medium.
Prepare Coating Stations: On one plate, mix the flour with paprika or cayenne. Place the beaten eggs in a second plate or bowl, and the bread crumbs in a third.
Coat the Cheese: Working with one slice at a time, coat the mozzarella slices first in the flour mixture, then dip in the beaten eggs, and finally coat with bread crumbs. Ensure each slice is fully coated.
Cook the Cheese: Spray both sides of the waffle iron with nonstick spray. Place as many coated cheese slices as will fit in the waffle iron, then close the lid. Cook for about 1 minute, or until the bread crumbs are golden brown.
Repeat: Repeat the process with any remaining cheese slices.
Serve: Serve the waffle iron “fried” cheese hot, either on its own or with salsa for dipping.
- Prep Time: 10 minutes
- Cook Time: 10 minutes
Nutrition
- Calories: 180